W43 | W68 – Leaflet | Strike Through
W43 | W68 - Strike Through
AMSTERDAM - Multi-purpose printability tester
Version: 2023-06
Introduction
W43-AMS - rubber 85 Shore A for very smooth papers.
W68-AMS - rubber 65 Shore A for very
smooth or rough papers.
Principle
Paper is printed at one side. The ink penetrates into the paper. After a certain time the ink does not penetrate any more. The whiteness at the back of the print and at the paper without the ink is measured. The strike through is calculated as a percentage of the original whiteness of the paper.


Method of operation
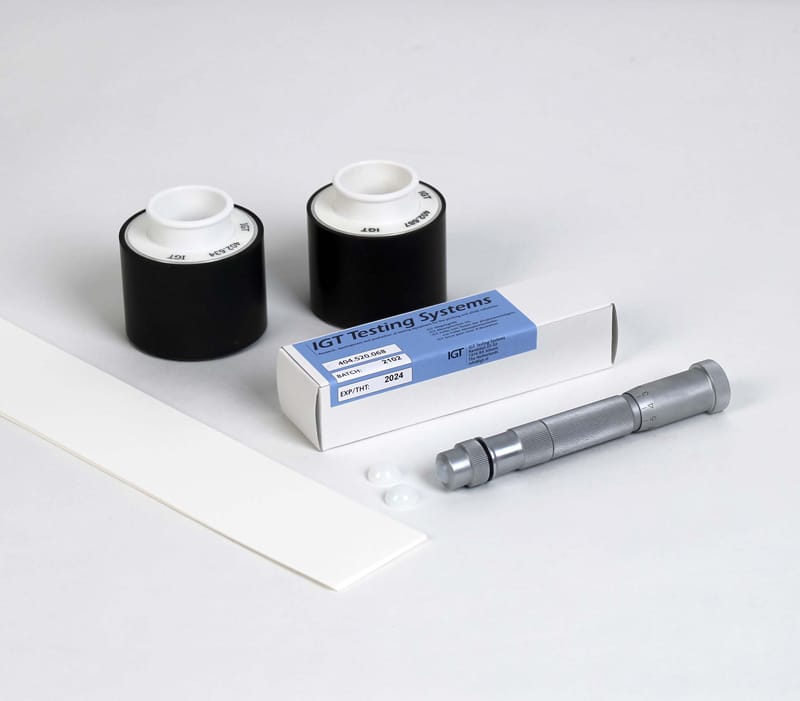
Materials
- [402.634.412] Printing disc with black rubber, 85 Shore A, pin, 50 mm
- [402.687.412] Printing disc with black rubber, 65 Shore A, pin, 50 mm
- [404.520.068] IGT Set off ink
- [466.000.710] IGT High Speed Inking Unit (HSIU)
- [466.003.003] Top roller, 4 segments for conventional inks
- [408.000.200] IGT ink pipette 0,01 ml resolution
- Strips of paper to be tested, preferable 55 x 340 mm², 3 strips per sample
- Lint free rags
- Cleaning naphtha and ethanol
Testing conditions
Standard test atmosphere according to ISO 187 (23,0 ± 1,0 °C and 50 ± 2% RH)
Sample conditioning
Be aware of the fact that a different way of conditioning of the samples can have influence on the results.
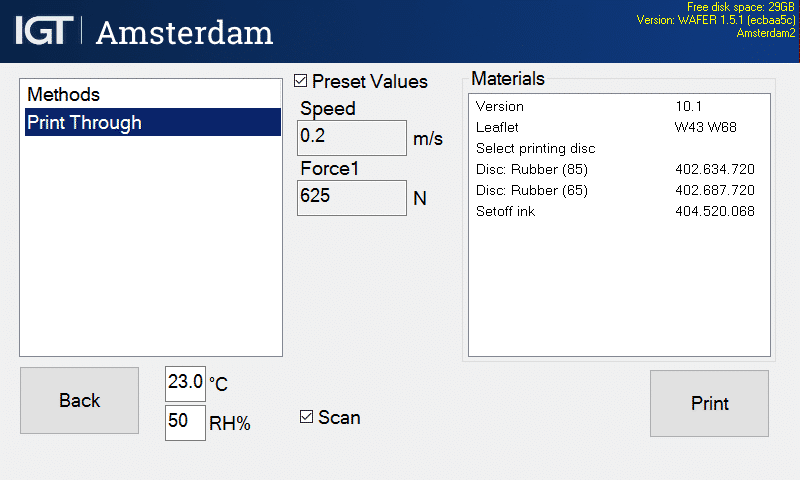
Standard settings
AMSTERDAM – multi-purpose printability tester
- Printing speed: constant 0,2 m/s
- Printing force: 625 N
- Ink film thickness 8 µm
IGT High Speed Inking Unit 4 (HSIU)
- Water bath: 23 °C (73,4 °F)
- Mode 2:
- Start-up time [10 s]
- Distribution time 1 [20 s] | Distribution speed 1 [0,5 m/s]
- Inking time discs [15 s]
Preparation
- Cut paper strips of 55 x 340 and mark with top and/or bottom side, machine and/or cross direction and a code for the paper.
- Select method Print Through.
- Fill the ink pipette with the ink to be used.
- Set the HSIU in Mode 2.
- Apply 0,35 ml of ink to a segment of the top roller and distribute the ink.
- Place the printing disc on the shaft of the HSIU and ink the printing disc.
NOTE: The amount of ink mentioned above is a guide line to reach an ink transfer of about 1 g/m².
Dependent to the type of paper, the type of ink and/or the desired ink film thickness this amount of ink must be changed.
Execution

- Mount a strip of paper or board to be tested on the sector.
- Touch the button [Print].
- Place the printing disc on the 1st printing shaft.
- Press both side buttons to make a print.
- If the camera was activated wait till the camera has scanned the print.
- Release side buttons when the display says DONE.
- If satisfied, save the results by entering your sample ID in the box [Batch].
- Take the printing disc from the shaft.
- Clean the printing disc.
- Remove the printed strip from the sector.
- Clean the rollers of the inking unit or use a clean segment for the next test.
- Touch [Back] and start up a new test. It is recommended to perform the test at least three times.
Store the printed strips in the standard atmosphere at a safe place so that it cannot be damaged for at least 24 hours.
Cleaning
- Clean the rubber printing disc with lint-free rags and cleaning naphtha.
- Clean all rollers of the inking unit, including the metal ones with lint-free rags and cleaning naphtha.
Assessment
If a scan was made
The print is scanned and shown in the display.
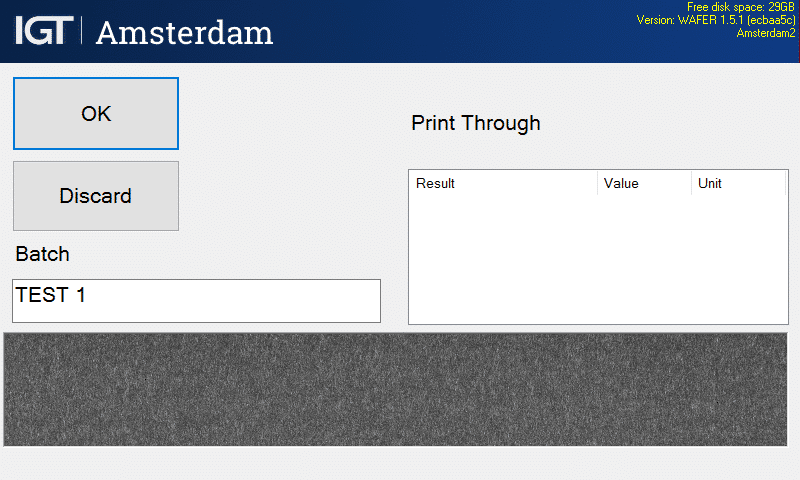
Magnification of the scan via touch screen is possible. Scan is saved as black and white images, these are only to be used for illustrative reasons.
- Measure the whiteness on the back of the blank paper on a stack of 1, 2, 3 and more sheets of this paper until the whiteness does not change any longer. The number of sheets of this paper forms the backing to use to measure the whiteness in the next points.
- Measure the whiteness at the back of the paper strip on the place where the paper has been printed (L*p) and on the place where the paper has not been printed (L*u). Use the backing as developed in point 1.
- Calculate the print through as:
Print through = (L*p : L*u ) x 100% - Repeat the points 2 and 3 for every strip.
- Calculate the average and if desired, the standard deviation. Sometimes it can be useful to mention the highest and lowest values as well.
NOTES
- Due to drying of the ink, it is not advised to add some ink to the same segment of the inking unit after a test. Clean the used segment first or choose the next segment of the top roller.
- IGT Set-off ink blue: Shelf stock time: 3 years | open time: 1 year.
Randstad 22 - 02
1316 BX Almere
The Netherlands
P.O.box 22022
1302 CA Almere
The Netherlands